
Today was a day punctuated with various other activities, so it wasn’t quite as productive as recent days. Nevertheless, I have pictures to share which I think readers may find of interest.
Last time, I gave an account of yatoi-sen, and showed some steps in making them. I’ll start today with a continuation of that process. With the lower end tenons completed and fitted, I next worked the upper ends.
First I cut the yatoi-sen to exact length, then rough dimensioned the upper end tenons, which will become a special type of dovetail soon enough:

I also cut crosswise notches in the pieces with the tablesaw, notches which define the shoulder for the cross-wise fixing pins, or shachi-sen:

I then set those aside, as I wanted to get the mortises done before the dovetail tenons. I figure it will be easier to size the tenons to their mortises, in this particular case, than the other way around.
First step was to use the kebiki to incise the lines for the bottom surfaces of the mortises, which are located on the lower ends of the mitered faces of the aprons:

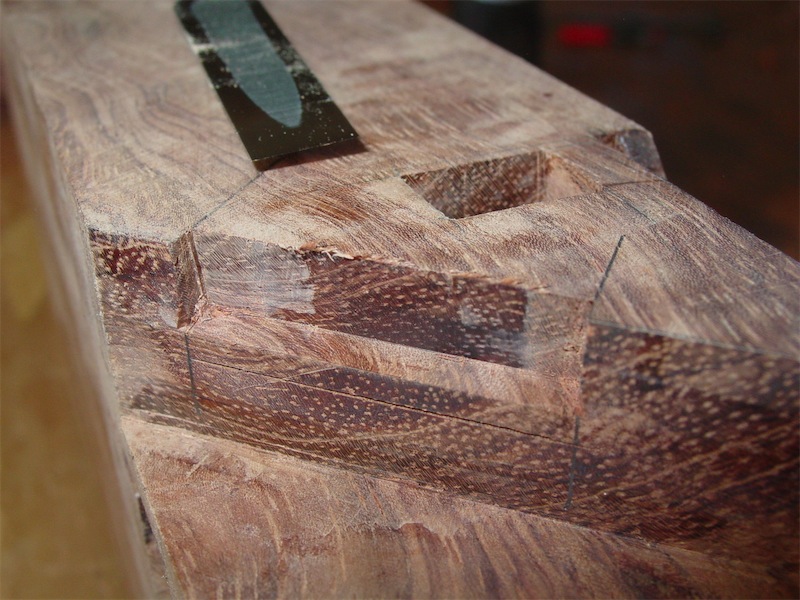
A few steps later on, I had the mortise half largely cut out:

Notice that the incised line done earlier remains about 1/8″ (@ 3mm) below the mortise. The dovetail tenon has a special shape to help protect the dovetail from short grain fracture issues, so the mortise has to reflect this shape. This will make more sense perhaps when I show the completed tenon in a future post.
Later I am chiseling the waste away to complete the mortise (half):

The completed dovetail half-mortise – one detail is that the mortise is slightly longer than the tenon, to allow for any slight fitting irregularities which my crop up later, and as a result I was a little less picky about have the mortise end walls perfectly cleanly cut:

Seemed like a good time to reassemble the table frame once those mortises were done – this time with the battens as well:

Another view:


Another view:

A closer look at one end, with the legs and Giant’s Arm braces fitted:

May as well take a step back for the big picture:

Another angle:

Then I decided to take a look at the top panels. I took them upstairs and with some degree of nervous apprehension, cross-cut and ripped them down to dimension. Talk about workmanship of risk – David Pye would be pleased. The risk in this case, however is not exactly what Pye was referring to – you see, these two 20″ wide edge grain bubinga planks, if I were to mis-cut them in some sort of terminal fashion, would be about $5000 to replace due to the sort of plank they need to come out of – I simply cannot make any mistakes with them. Measure 6 times, then cut.
So far so good. The cross-cutting and ripping went fine, and I placed the planks on the table and rearranged them a few times. I also asked John and Barry, who have a shop upstairs in the same building, to come down and give me their $0.02 in terms of the arrangement of the two planks. I think we rearranged those planks 10 times over.
In the end, I selected this pattern:

Tomorrow promises to be a longish day, as I hope to complete all of the joinery to attach that top to the support structure below. Let me say this: I can’t wait to see this piece in oil!!
Thanks for coming by today my friends. –> on to post 44